A Step-by-Step Guide to Satellite Dish Installation for Beginners
# A Step-by-Step Guide to Satellite Dish Installation for Beginners
Are you tired of paying exorbitant monthly fees for cable TV? Do you dream of accessing a world of diverse channels without breaking the bank? Look no further! Installing your own satellite dish can be a rewarding and cost-effective way to unlock a vast array of free-to-air satellite channels. This comprehensive guide will walk you through every step of the **satellite dish installation** process, ensuring even a complete beginner can successfully set up their own **DIY satellite TV** system. Get ready to enjoy crystal-clear picture quality and a wealth of entertainment right from your backyard!
## Section 1: Before You Begin – Essential Preparations
Before you grab your tools, some crucial groundwork will ensure a smooth and successful installation.
### What You’ll Need: Tools and Materials
Having the right equipment on hand will save you time and frustration.
**Essential Tools:**
* **Drill:** For mounting brackets.
* **Wrench Set:** To tighten bolts and nuts on the dish assembly.
* **Compass:** To determine the correct azimuth (horizontal direction) for your dish.
* **Inclinometer (or Angle Finder):** To set the correct elevation (vertical angle) of the dish. Some satellite finders have this built-in.
* **Satellite Finder Meter:** An invaluable tool that provides audible and visual feedback for signal strength, making dish aiming much easier. Basic analog models are inexpensive and effective.
* **Ladder:** For safe access to mounting locations.
* **Coaxial Cable Stripper:** To prepare the coaxial cable ends for connectors.
* **F-Connector Crimping Tool:** To securely attach F-connectors to the coaxial cable.
* **Wire Cutters:** For cutting cable and grounding wire.
* **Pencil/Marker:** For marking drill points.
* **Measuring Tape:** For precise measurements.
* **Level:** To ensure your mounting pole is perfectly vertical.
**Materials You’ll Need:**
* **Satellite Dish Kit:** This typically includes the dish reflector, mounting pole/bracket, and the LNB (Low Noise Block downconverter). Ensure it’s compatible with the satellites you wish to receive.
* **Coaxial Cable (RG6 or RG11):** High-quality cable is essential for minimal signal loss. Purchase enough to reach from your dish to your receiver.
* **F-Connectors:** Screw-on or compression type, compatible with your coaxial cable.
* **Cable Clips or Zip Ties:** To secure the coaxial cable neatly and prevent damage.
* **Silicone Sealant or Coaxial Weatherproofing Boots:** To protect outdoor connections from moisture.
* **Grounding Wire (10-gauge minimum):** For safety, to ground your dish.
* **Ground Rod (if no existing grounding point is available):** For connecting the grounding wire.
* **Satellite Receiver/Decoder:** To process the satellite signal and display channels on your TV.
### Choosing the Right Location: The Key to Signal Success
The placement of your satellite dish is paramount. A clear line of sight to the satellite is non-negotiable.
* **Direction:** For most geostationary satellites serving the Northern Hemisphere, your dish will need an unobstructed view towards the **south**. If you’re in the Southern Hemisphere, it will generally be north. Use an app or online tool (like DishPointer.com) to find the exact azimuth and elevation for your location and desired satellite.
* **Obstructions:** Crucially, there should be *absolutely no obstructions* between your dish and the satellite. This includes trees, buildings, hills, or even dense foliage. A small branch can block your signal.
* **Accessibility:** Choose a location that is accessible for safe installation, aiming, and future maintenance. A sturdy wall, a strong roof fascia, or a dedicated ground pole are common choices.
* **Safety First:** Avoid mounting near power lines or in areas prone to strong winds without proper reinforcement.
### Understanding Satellite Signals: Azimuth, Elevation, and Skew
To successfully aim your dish, you need to understand three key angles:
* **Azimuth:** This is the horizontal direction (east-west) your dish needs to point, measured in degrees clockwise from true north (e.g., 180° is south). Your compass will be used for this.
* **Elevation:** This is the vertical angle (up-down) of your dish, measured in degrees from the horizontal plane. Your inclinometer or angle finder will help you set this.
* **Skew (Polarization):** This refers to the rotation of the LNB. Satellites transmit signals on different polarizations (horizontal and vertical) to maximize channel capacity. The LNB needs to be rotated slightly to correctly receive these signals. This angle is usually given in degrees and is set by rotating the LNB itself.
Online tools and satellite finder apps (many are free for smartphones) are excellent resources to get precise azimuth, elevation, and skew settings for your exact location and the satellite you want to target.
## Section 2: Step-by-Step Installation Process
With preparations complete, let’s get hands-on!
### Step 1: Assemble the Satellite Dish
Carefully follow the manufacturer’s instructions that came with your dish kit.
* **Unpack all components** and ensure nothing is missing.
* **Assemble the dish reflector** to the support arms.
* **Attach the LNB arm** to the dish assembly.
* **Mount the LNB** onto the end of the LNB arm. Ensure it’s secure but allow for slight rotation for skew adjustment later.
### Step 2: Mount the Dish
Safety is paramount here. If working on a roof, ensure you have appropriate safety gear.
* **Choose a sturdy mounting point:** A solid wall, a strong roof truss, or a concrete ground pole.
* **Mark drill holes:** Hold the mounting bracket against your chosen surface, ensure it’s perfectly level using your spirit level, and mark the drill points.
* **Drill pilot holes:** Drill holes appropriate for your mounting hardware.
* **Secure the mounting bracket:** Use heavy-duty lag bolts or expansion bolts to firmly attach the bracket. Ensure it can withstand wind and the weight of the dish.
* **Attach the main pole/mast** to the secured bracket. Use your level to ensure the pole is perfectly vertical. This is critical for accurate aiming.
### Step 3: Connect the Coaxial Cable
High-quality connections prevent signal loss.
* **Prepare the cable:** Using your coaxial cable stripper, carefully strip back the outer jacket, shield, and dielectric to expose the copper center conductor, following the F-connector manufacturer’s guidelines. Avoid cutting or damaging the braided shield or center conductor.
* **Attach F-connectors:** Either screw on the F-connectors securely or use your crimping tool for compression connectors. Ensure no stray strands of shield touch the center conductor, as this will short the signal.
* **Connect to the LNB:** Attach one end of the coaxial cable to the F-connector port on the LNB. Hand-tighten, then use a wrench to snug it up, but do not overtighten.
* **Run the cable:** Route the cable neatly from the dish to the location of your satellite receiver. Use cable clips to secure it along walls or eaves, avoiding sharp bends.
* **Weatherproof:** Cover the LNB connection with a rubber weather boot or wrap it thoroughly with self-amalgamating tape and then electrical tape to prevent water ingress.
### Step 4: Grounding the Dish (Critical Safety Step!)
This step protects your equipment and, more importantly, your home from lightning strikes and electrical surges.
* **Connect grounding wire:** Attach a 10-gauge (minimum) copper grounding wire to a dedicated grounding lug on the satellite dish mount.
* **Run to ground:** Route the grounding wire to an approved electrical ground point. This could be a dedicated ground rod driven into the earth near the dish, or it can be connected to your home’s existing electrical service ground (usually at the main electrical panel). Consult local electrical codes or an electrician if unsure.
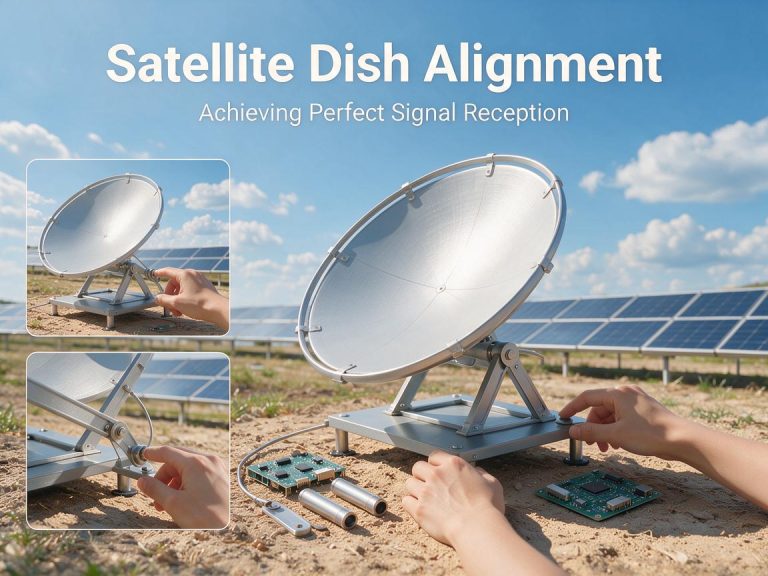
### Step 5: Aiming the Dish – The Crucial Step
This is often the most challenging but also the most rewarding part. Patience is key!
* **Initial Alignment:**
* **Azimuth:** Using your compass and the azimuth angle you determined earlier, point the dish roughly in the correct horizontal direction.
* **Elevation:** Adjust the elevation bolts on the dish mount to set the approximate vertical angle according to your calculated elevation.
* **Skew (LNB Rotation):** Rotate the LNB to the approximate skew angle.
* **Connect the Satellite Finder Meter:** Connect the coaxial cable coming from the LNB to the “LNB” input on your satellite finder meter. Then, connect a short piece of coaxial cable from the “Receiver” or “To Rx” output of the meter to your satellite receiver.
* **Power on the Receiver:** Turn on your satellite receiver and TV. Go to the “Antenna Setup” or “Dish Setup” menu on your receiver. Select the correct satellite.
* **Fine-Tuning for Signal:**
1. **Slow Sweeps (Azimuth):** Slowly sweep the dish horizontally (left and right) in very small increments around your estimated azimuth, listening to the satellite finder meter. You should hear a tone and see the needle move or LEDs light up.
2. **Vertical Adjustments (Elevation):** Once you find a signal, tighten the azimuth slightly, then slowly adjust the elevation up and down in small increments to maximize the signal.
3. **Peak the Signal:** Once you’ve achieved a strong signal, make very small, precise adjustments to both azimuth and elevation to get the absolute highest signal strength and quality readings on your satellite finder meter and receiver’s signal strength display.
4. **Adjust Skew (LNB Rotation):** With azimuth and elevation peaked, gently rotate the LNB clockwise or counter-clockwise in very small increments. This fine-tunes the polarization and can significantly boost signal quality.
* **Tighten All Bolts:** Once you’ve achieved the maximum signal, carefully tighten all bolts on the dish mount and LNB arm. Do this slowly, re-checking the signal strength after each bolt is tightened, as overtightening can sometimes shift the dish slightly.
### Step 6: Connect to the Satellite Receiver/TV
The final connection for viewing!
* **Connect coaxial cable:** Disconnect the satellite finder meter and connect the coaxial cable directly from the dish to the “LNB In” or “Satellite In” port on your satellite receiver.
* **Connect receiver to TV:** Use an HDMI cable (recommended) or RCA cables to connect your satellite receiver to your television.
* **Scan for Channels:** Follow your receiver’s instructions to perform a channel scan. This will find and store all available channels from the satellite you’ve aimed at.
## Section 3: Post-Installation and Maintenance
Once your dish is installed and working, a few steps will ensure longevity and optimal performance.
### Weatherproofing and Stability
* **Seal connections:** Re-check all outdoor coaxial connections. Use silicone sealant around the F-connectors or ensure weather boots are securely in place to prevent moisture ingress, which can degrade signal over time.
* **Cable management:** Ensure all cables are neatly secured and protected from physical damage, sharp edges, and excessive exposure to sunlight.
* **Check stability:** Gently push on the dish to ensure it’s firmly mounted and doesn’t wobble. High winds can move a poorly secured dish, causing signal loss.
### Maintenance Tips
* **Regular Checks:** Periodically inspect your dish for any physical damage, loose connections, or obstructions (especially after storms).
* **Clear Obstructions:** Trim any tree branches or clear away any new growth that might obstruct the signal path.
* **Clean the Dish:** If dust or dirt accumulates on the dish reflector, it can slightly reduce signal strength. Gently clean it with water and a soft cloth (do not use abrasive cleaners).
## Section 4: Troubleshooting Common Issues
Even with careful installation, you might encounter some common problems.
* **”No Signal” or “Weak Signal”:**
* **Re-check Aiming:** The most common cause. Re-aim the dish carefully, focusing on small, precise adjustments with your satellite finder.
* **Obstructions:** Double-check for anything blocking the line of sight.
* **Loose Connections:** Ensure all F-connectors are tight and properly made.
* **Damaged Cable/LNB:** Inspect the coaxial cable for cuts or kinks. A faulty LNB can also be the culprit.
* **Pixelation or Freezing Picture:**
* This usually indicates a weak signal. Fine-tune your dish aiming even further to maximize signal quality.
* Check for any minor obstructions.
* **Missing Channels:**
* Ensure your receiver is configured for the correct satellite.
* Perform a new channel scan.
* Check the LNB skew setting – slight adjustments can bring in missing channels.
## Conclusion: Enjoy Your Free Satellite TV!
Congratulations! You’ve successfully installed your own satellite dish. This **beginner’s guide to satellite dish installation** has provided you with all the knowledge and steps to unlock a world of **free satellite channels**. The satisfaction of a successful DIY project, combined with the endless entertainment possibilities, makes this effort truly worthwhile. Enjoy exploring the vast universe of satellite television! Share your experience in the comments below!